Saturday 24 December 2011

Customising or Modding Ogres

With the increasing cost of 'Hero' models for tabletop wargaming I decided to made some of my own using the basic ogre body.

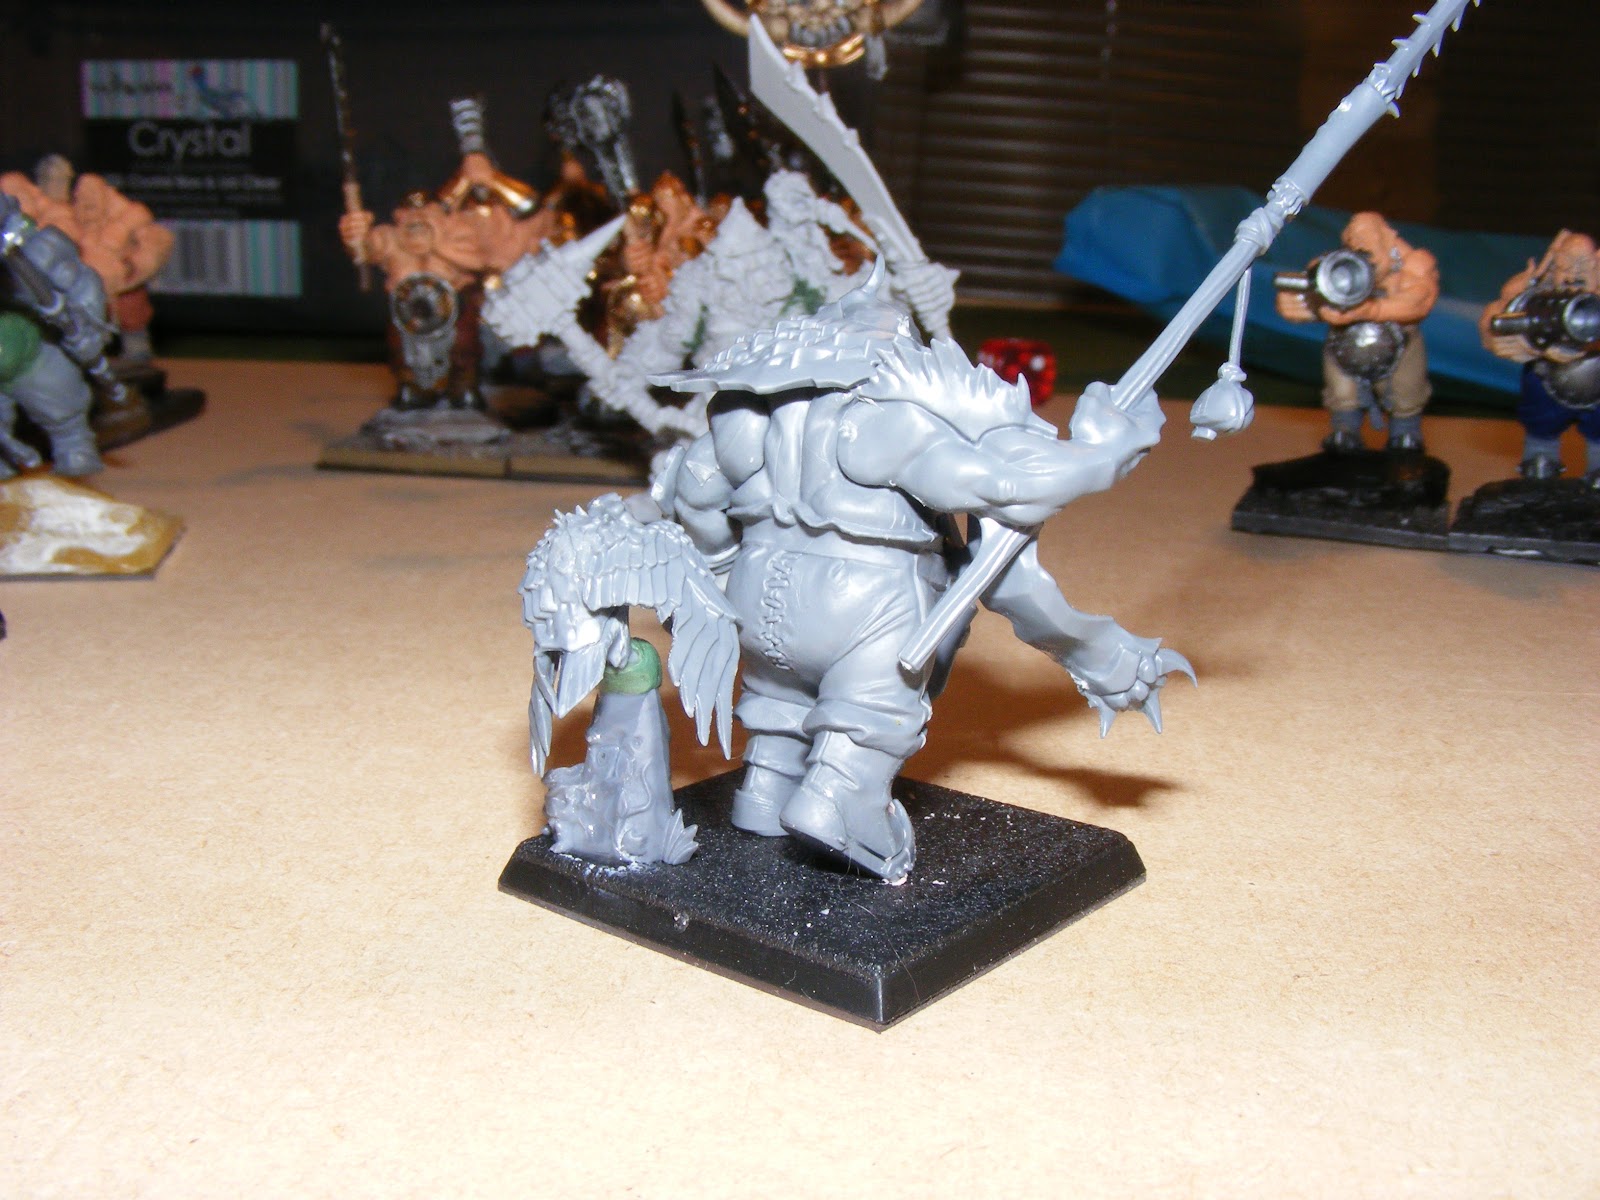
The first character I decided to make was that of a slaughter-master/butcher. The ogre race is inflicted with an insatiable appetite and the ogre magicians are the most glutinous of the race! They differ from the regular ogres in that they don't where a gut plate. This presented a problem as the basic figure has a huge hole in the middle to accommodate the plate. I over came this with green stuff filling the hole and forming a huge belly. To balance this I also increased the back fat with green stuff as well.


The wizard staff is a modded flag pole with a skaven claw-rock fixed to the end. 


One of the extras that you get on the ogre sprue is the hock on ropes. To indicate a 'take out meal' I attached a couple of meat joints , also from various ogre sprues.

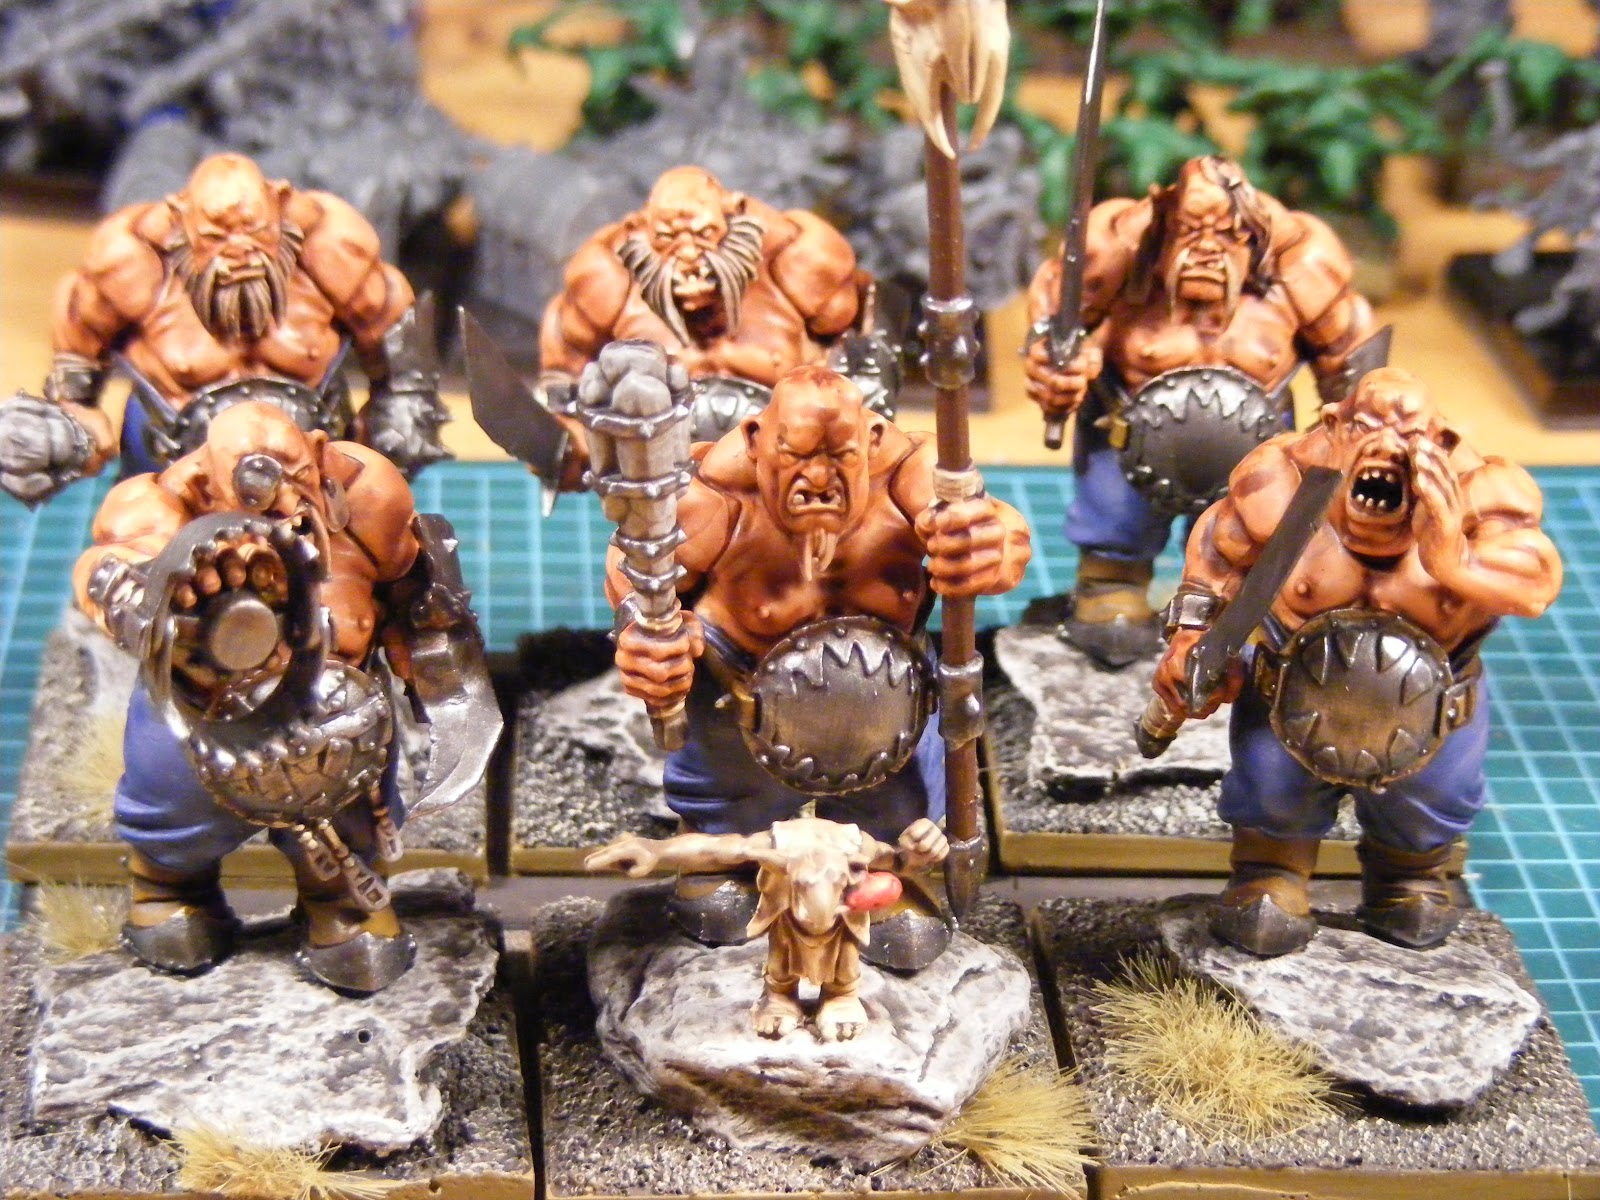
I would like to try out a unit of Man Eaters in the army but for a unit of 4 your looking at around £80, ouch! Again out came the green stuff to create simple mods to distinguish the models from regular ogres. I wanted a pirate theme so pirate hats all round! When I paint I intend to have a skull and crossbones symbol on the banner.

Each Maneater I have given a pistol. This is for ranged attacks and the extra attack in combat. The ogre sized pistols are from the mournfang kit. 


I gave the bellower a telescope from the manor house kit to give him a nautical themed weapon.


When you're out of ammo use your pistol as a club - truly the ogre way!

The Thundertusk/stonehorn kit comes with many of the components required to make a hunter. I didn't use the bits as I built the thundertusk.


The vulture I mounted on a wood elf forest rock.


The box of regular ogre bodies costs around £22 but with the bits left over from other sprue's and some green stuff I managed to save spending around £110 on finecast heroes.

Friday 14 October 2011

A Thousand Points of Ogres

I've been under the weather this week with laryngitis. If the say 'every cloud has a silver lining' is true my silver lining this week has been that I now know how to spell laryngitis! I've been sleeping most of the time and haven't been in my shed for over a week! I even had to cancel a gaming session with Jon last Sunday! 


On the road to recovery now (still sore but without the Barry White voiced box!) and managed to get in my man cave for a couple of hours this evening to take some photos of the ogres that have been waiting for me.


This is the new slaughter-master/butcher in finecast. I was a bit disappointed in the quality of this model as I had to put extras onto his back to hide the roughness of his back in some areas. I think it ironic that GW have just released a range of tools to help correct errors with their finecast that in itself was supposed to correct the casting process of metal. 


This guy has an insatiable appitite so racks of meat ready for a snack seemed appropriate.


The Tyrant/ bruiser character was created from a bog standard ogre with extra work on the helmet, base and armour to give him the distinguished look.


The lead belchers use cannons as guns. Not very accurate but deadly at short range.


Iron guts are the elite fighters of the ogres. I used a combination of bronze and silver metallics to differentiate between them and the basic ogre troops shown below.


Sunday 18 September 2011

Big is Beautiful!

With the release of Games Workshop's new Ogre Army Models I decided to take the plunge and build a new army. Few would disagree that the ogres needed a new book and it's one of the few book releases that I was looking forward to getting. Big is beautiful in this new book and the models are true 'eye candy'.


First thing that I noticed is the change in skin colour. Ogres were always known for their khaki skin colour which has changed to a dwarf skin colour. A change I whole heartedly agree with but different none the less. Magic has been brought into line with other magical lores in that they have a signiature spell and six others. The lore attribute allows the slaughtermaster/butcher to heal himself with the occasional mishap causing more damage.


This photo is slightly blurred but does indicate the scale of some of the new ogre models. Shown here is the new 'Thundertusk' next to a Bretonnian Knight. (I Know who my money would be on!)

During the past week since my purchase I've made up some plastic bases, removed and smoothed mould line and under coated a major portion of the army. I have only completed three 'Iron Guts' and made a slaughtermaster/butcher from a standard ogre and some bits. As I intend to keep and play this army for years I am in no rush to get these guys done.


While still a core choice the ironguts are among the hardest hitting units in the game. They have a strength 4 stat line with +2 for great weapons wounding most troops on a 2 up. With three attacks each that makes the eye watering for enemy troops. The main downfall is a relatively low armour save for the cost. Heavy armour with 43 points each irongut, ouch. The dragonhide banner is worth a mention for this unit allowing you to re role 1's on hits, wounds, armour saves and ward saves. You can also use a breadth weapon from it, all for 50 points- bargain!


I used vallejo red ink for the blood because the gloss allows it to look fresh.


These slaughtermaster/butchers are known for their insatiable appetite so a rack of ribs seemed appropriate. 


The constant up and down of the slaughtermaster/butcher's wounds I've represented using spears in the foot. Oh yes that is a full size shield on his shoulder blade!

There will be more to come from ogres in the next few weeks - I think I'm in love ;)

Sunday 4 September 2011

Imperial Guard Project - Commissar Yarrick

I've spent a few days painting up some Imperial Guard that I've had stored away for close to twelve months now. The intention is to sell this starter army, around 1000 points on ebay.


The HQ for this army is Commissar Yarrick.


The miniature is metal rather than the new finecast version. I was keen to paint the miniature in the exact colour scheme for this character but was surprised to see different versions of him even on the official GW site. I decided in the end to use the colour scheme on the front of the Finecast Box as it will be the standard for the next few years.


Commissars are not really the kind of people that you would want to spend any time with. Their main function is to keep the men in their charge in line, executing both commanders and lower ranks should they show 'cowardice'. In the Imperial Guard such cowardice would include the reluctance to throw your life away on hopeless causes. While Yarrick would not hesitate to take such action his leadership inspires his men making such instances rare.

His reputation was enhanced when he single handedly fought an Ork Warboss who severed Yarrick's arm off with a power claw. Yarrick fought on decapitating the Warboss' and crying out the battle charge before allowing himself to pass out. This led the orks to believe that he could not be kill and that he could kill with a mere glance.To encourage this reputation Yarrick had the very power claw he had lost his arm to be fitted in replacement, and later when he lost an eye, to have a laser fitted in the socket so that he could actual kill using his orks.


I've based Yarrick on a plain sand base to match the rest of the battle force.


The line on the cap was very frustrating. Despite taking the usual precautions the line keep reappearing. More noticeable in the photo than in real life.


Close up of the claw. In the Ork style rather than the usual Imperium power fists.


Most of the detail on the model is on the breast plate and cap.


Sunday 10 July 2011

How to make a Modular Wargaming Table - -Part 2

The last post saw the vast majority of work on this project. Essentially there are only two steps that haven't been shown.


The first was to paint the whole board with and 'undercoat' of paint so that the blue of the foam and the brown of the MDF is tied in. This colour does show through the sand in places so I felt the need to get a uniform colour. I used a simple poster paint that was reddish brown in colour as I felt that I was the closest to sandstone that I had.


Once dry I then went on to cover the flat areas of the terrain, and some sections of the slopes, with PVA or white glue as it is sometimes referred to. Sand is poured onto this wet glue and allowed to set. I left it overnight to ensure the glue had set properly. Excess sand is then removed and the step repeated if needed.This post is mainly here to give an example of the finished product.


This photo shows the stage of applying sand to the wet glue before any excess sand is removed.


Finally a couple of photos of the modular gaming table in one of its possible configurations. The floating scenery was made from off cuts of the blue foam used for the fixed hills (Remember never throw anything away! ;)

We played our first battle on it yesterday and it worked a treat. The battle will be uploaded to Youtube soon on our 'wargamingforfun' channel if you want to see it in action.

Monday 4 July 2011

How to make a Modular Wargaming Table - -Part 1

I have played my wargames on the same green background for nearly a year now. With the release of the Tomb Kings from Games Workshop I thought now would be the ideal time to develop a desert landscape table top. I also decided to make the table top modular. The main advantage to this is that it's possible to vary each battle without have shelves upon shelf of scenery. Ideally when finished the table top will be able to stack upon itself being no more than six inches ( 15cm) high. 


This is more of a 'how I did it' rather than ' do this then do that' article. if you are going to follow these instruction please take all necessary safety precautions and ensure that you know how to use any tools safely and properly.


Step 1
I decided to dived the traditional 6x4 gaming table into 2x2 squares placing scenery to four of the squares. I used 6mm MDF to make each of the six 2x2 wooden squares.

Step 2
Next I placed a piece of card (approximately 2x2) in the junction between the four square pieces of MDF.


Step 3
I drew an outline that I felt suitable for sandstone type hills. (Yes it does look a little like a wolf's head in many of the photos but that was purely by accident!) I was careful to ensure that each of the parts of the hill meet on the outside of each square on the junction lines. This will allow the 'turning' of the square for maximum compatibly.


Step 4
I removed the unwanted card to make a template for use on the blue foam to follow.


Step 5
I used the card template to draw around onto the blue foam. The blue foam that I used is around 2 inches (50mm) thick.


Step 6
It is important that the centre, or join lines, of the hills be added at this stage as well as it helps a great deal later lining up the blocks with the MDF boards.


Step 7 
Cut of the blue foam. I used a simple band saw but you could always use a fret saw or a coping saw if required but it would obviously not result in a some finish as shown above. 


Step 8
This is one of the most time consuming and messy stages. In order to get the look of sandstone cut in to the side with a suitable backed saw. (Sometimes referred to as dove tail saws.) The break the foam by twisting the blade. I have seen this done with a large knife. As long as the blade can take the twisting motion without twisting you should obtain the required result.


When working around the outside of the hill network I tried to ensure that all of the joint lines were approximately the same height. Again this was to ensure maximum compatibility between different joints.


The completed hills.


Step 9
The next stage was to cut the four sections so that there is four separate hills.The set-up demonstrating the configuration to achieve one large hill.


This set-up shows the four pieces when arranged as two medium hill.


The final configuration demonstrating four small hills.

Step 10
In each of the four squares I drilled holes in the corners. The purpose of these is to hold the hills in place while the glue dries. The add a lot of strength to the finished table top but it is important to countersink these holes so that the screws do not damage the table that they are placed on.


Step 11 (and final step of part one!)
Ensure all of the pieces line up before you finally fix the foam to the MDF. Once you are happy place generous amounts of wood/PVA/white glue on the underside and screw to hold the blocks in place while the glue sets.