This is more of a 'how I did it' rather than ' do this then do that' article. if you are going to follow these instruction please take all necessary safety precautions and ensure that you know how to use any tools safely and properly.
Step 1
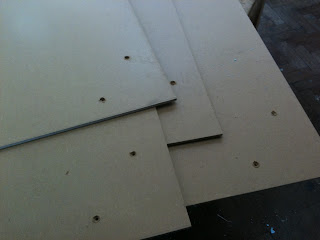
I decided to dived the traditional 6x4 gaming table into 2x2 squares placing scenery to four of the squares. I used 6mm MDF to make each of the six 2x2 wooden squares.
Step 2
Next I placed a piece of card (approximately 2x2) in the junction between the four square pieces of MDF.
Step 3
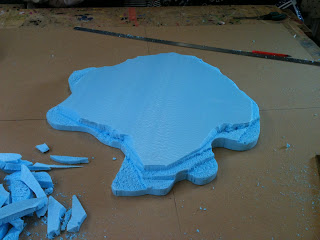
I drew an outline that I felt suitable for sandstone type hills. (Yes it does look a little like a wolf's head in many of the photos but that was purely by accident!) I was careful to ensure that each of the parts of the hill meet on the outside of each square on the junction lines. This will allow the 'turning' of the square for maximum compatibly.
Step 4
I removed the unwanted card to make a template for use on the blue foam to follow.
Step 5
I used the card template to draw around onto the blue foam. The blue foam that I used is around 2 inches (50mm) thick.
Step 6
It is important that the centre, or join lines, of the hills be added at this stage as well as it helps a great deal later lining up the blocks with the MDF boards.
Step 7
Cut of the blue foam. I used a simple band saw but you could always use a fret saw or a coping saw if required but it would obviously not result in a some finish as shown above.
Step 8
This is one of the most time consuming and messy stages. In order to get the look of sandstone cut in to the side with a suitable backed saw. (Sometimes referred to as dove tail saws.) The break the foam by twisting the blade. I have seen this done with a large knife. As long as the blade can take the twisting motion without twisting you should obtain the required result.
When working around the outside of the hill network I tried to ensure that all of the joint lines were approximately the same height. Again this was to ensure maximum compatibility between different joints.
The completed hills.
Step 9
The next stage was to cut the four sections so that there is four separate hills.The set-up demonstrating the configuration to achieve one large hill.
This set-up shows the four pieces when arranged as two medium hill.
The final configuration demonstrating four small hills.
In each of the four squares I drilled holes in the corners. The purpose of these is to hold the hills in place while the glue dries. The add a lot of strength to the finished table top but it is important to countersink these holes so that the screws do not damage the table that they are placed on.
Step 11 (and final step of part one!)
Ensure all of the pieces line up before you finally fix the foam to the MDF. Once you are happy place generous amounts of wood/PVA/white glue on the underside and screw to hold the blocks in place while the glue sets.


Impressive start. Looking forward to seeing more of the terrain pieces.
ReplyDeleteLooking good buddy! Would love to see some updates! :)
ReplyDelete