Sunday, 23 September 2012

Air Brush Spraying Booth - Studio Gets an Update

I have been thinking for a while of upgrading the ventilation in the man cave to remove the unwanted paint spray from the airbrush. Up to now I've used a filtered solder fume extractor and an open door but during the winter months it can be chilly. I wanted a system that totally remove the unwanted air from the mancave and at the same time not be fixed in one location tying up vital 'real estate' on my desk.

In order to do this I used a 35litre tub, a shower ventilation fan, a tumble dryer hose, and an exterior vent plate. If you want to see how read on!


35 litre tub £4.99


Vent cover £2.99


Tumble dryer hose £2.99 (this one came with a jubilee clip)


Extractor fan, often used for ventilating in door kitchens and bathrooms to remove unwanted fumes. £19.99


First I marked out the fan size hole that I would need in the back of the plastic tub.


 I found it move effective to use my 'dremel drill' to remove the unwanted plastic.


I then found out a cable left over from an electrical appliance and removed the unit plug off of the end. This provided me with a ready made power lead. [PLEASE NOTE THIS IS A BLOG OF HOW I DID THIS NOT AN INSTRUCTION LIST FOR YOU TO DO THE SAME. PLEASE ONLY MESS WITH MAINS POWER IF YOU KNOW WHAT YOUR DOING!]


Once I had removed the rubber sleeving from the wire it looked like this. 


 The automatic bathroom fan comes on when the light switch is turned on. To simulate this I used a small connecting piece of wire.


You can see in the above picture the small wire connected between the mains power and the light switch input. 


I then popped the two front covers on.


I then marked four bolt holes and fixed the fan to the tub.


This is the pane of glass that I removed (yes broken by my son during his football training in the garden!)


I cut out the piece of 5mm HIPS, I could have used acrylic but I had this to hand. I then used the same technique to remove the circle as I did on the tub.


This picture shows the four bolts holding the fan vent in place. 


An outside view of the fan vent.


The fan vent is great at keeping outside the rain, closing automatically with gravity when the fan is not on.


Plastic with vent in place.


An air hose is connected between the plastic plate and the tub using a jubilee clip. This allows for the tub to me moved around the desk.


 In place ready for airbrushing on the desk.


Not many of the things that I airbrush will be as big as a hell brute but I thought I would show him in there to give an indication of the size.

I am hoping that this £30 rig will help to look after my lungs and when the tub looks a little worn it will only cost the price to a new tub to carry on. 

Hope this has been of some use, Ade

Sunday, 9 September 2012

Empire Demigryph Knights - Painting Tutorial Tease


After a busy five days at work I decided to sit down and chill out by making a painting tutorial for the new empire demigryph knights. The painting tutorial series 'painting for us mere mortals' is aimed at novices or those with a low skill set to help them improve. So far it has been relatively popular and over time I anticipate building up a good range of model tutorials. I would add add this point that I do not view myself as an especially good painter but I am a teacher and enjoy passing on things that I have picked up or that I have been shown.


The new empire demigryph knights are monsterous cavalry and are comparable with the mournfang cavalry of the Ogre Kingdoms army in Warhammer Fantasy. Looking at the stats they seem slightly harder hitting than mournfang but more brittle on defence. 


The kit is supplied in boxes of three and these have full command. Eventually I intend to field up to two units of four. I don't think the second ranks are effective with these as only the rider gets to attack from the second rank and with these it is the demigryph who you are paying the points for.


A close up of the model shows that, even with a basic paint job, the models look great. There are some reigns that I have yet to fit.

Sunday, 2 September 2012

Empire Steam Tank - Painting Tutorial Tease

I have just completed a painting tutorial for the Empire Steam Tank and thought that I would share the finished photos before the tutorial release later this week.


I am not going to give away too many secrets here, you will have to watch the vid for that ;) but I used a graphics pen to do the text. This tip was given to me by Matt Perks (ubique-matt.blogspot.com) and has saved me tip and stress when doing text. I still feel I can improve in this area but that will come with practice.


The steam tank captain does look more like Santa than a hardened veteran but I like the idea of a professor fighting with his inventions than a sword and shield. As a side point you can build the steam tank engineer with a more grizzled look with the ample head and arm configurations provided in the kit.


Every steam engine should have a red section on the valve, and of course the needle should be kept on the danger line at all times!

Wednesday, 29 August 2012

Empire Steam Tank - Beauty More Than Skin Deep


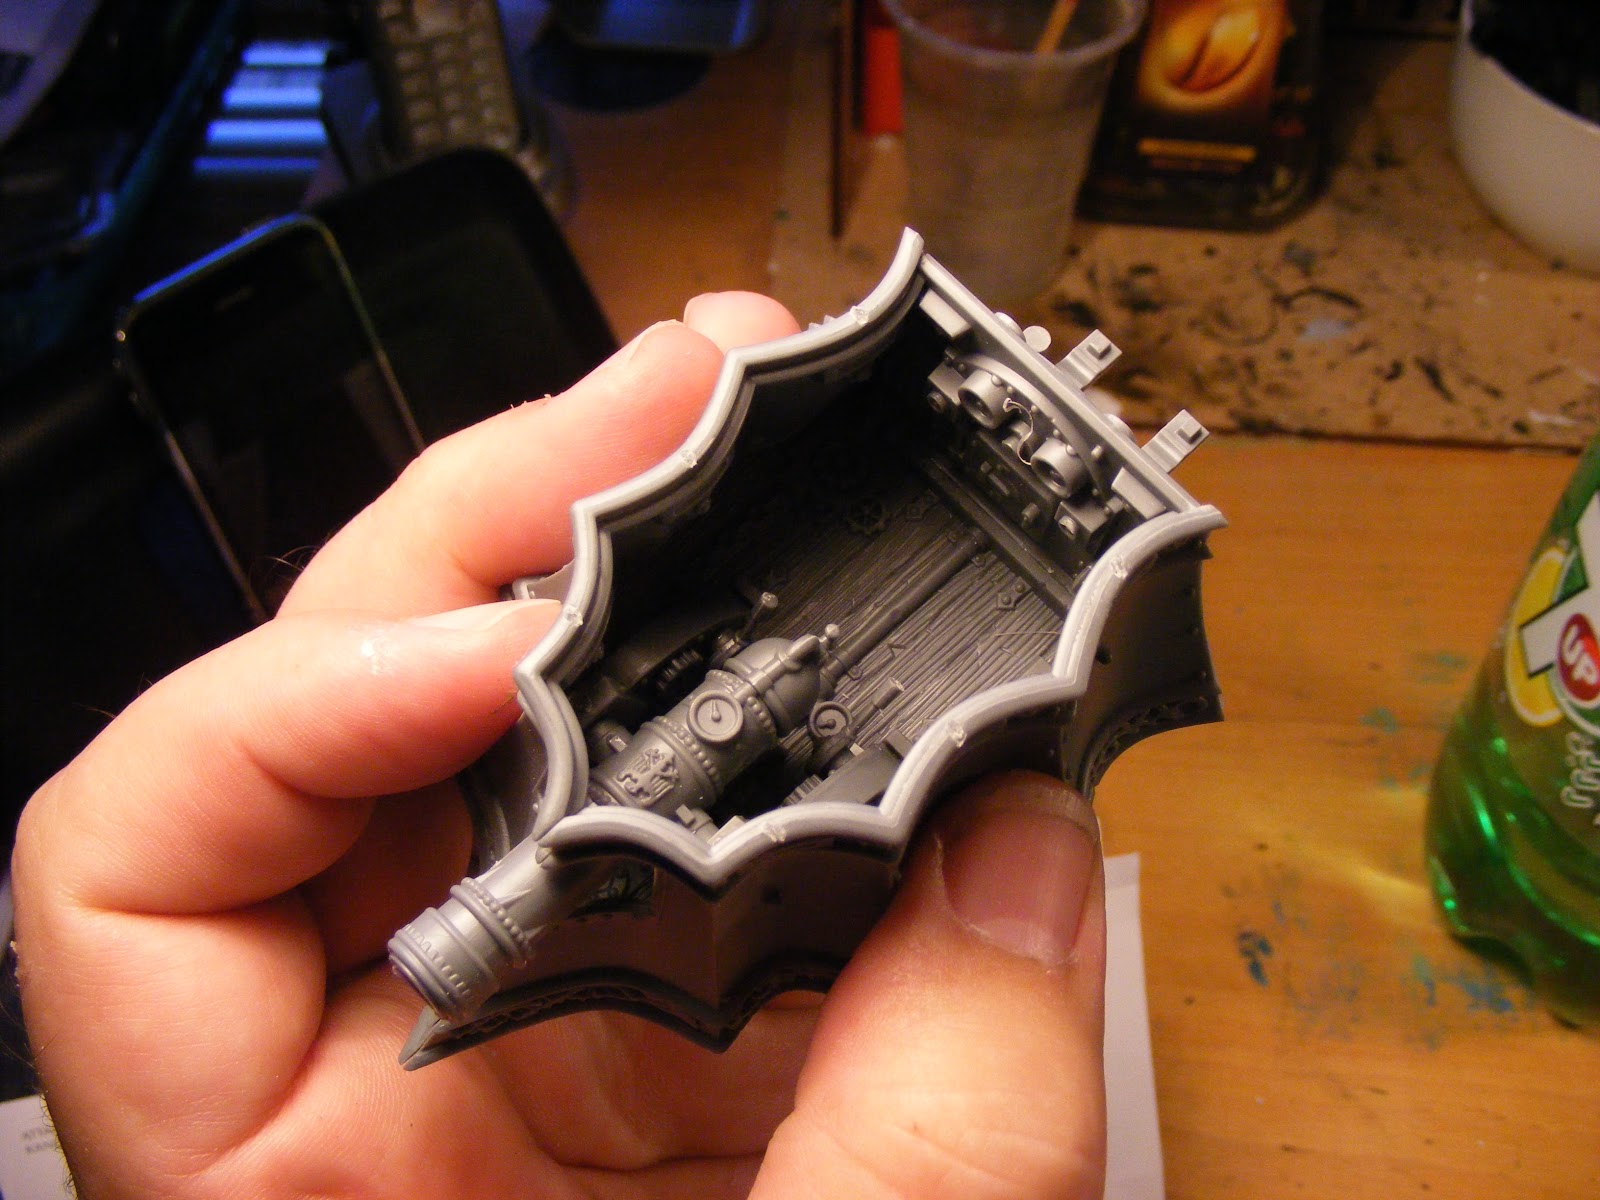
This evening I put together a steam tank model from Games Workshop. I was impressed with the level of detail in this plastic model from the start, but as I started putting the pieces together it soon became evident that much of this detail will remain hidden to the world.
 
 
The wooden detail from inside the tank along with the detail on the boiler door is covered by the side armour plates during construction.


More hidden during the fixing of the top plate.
 
 
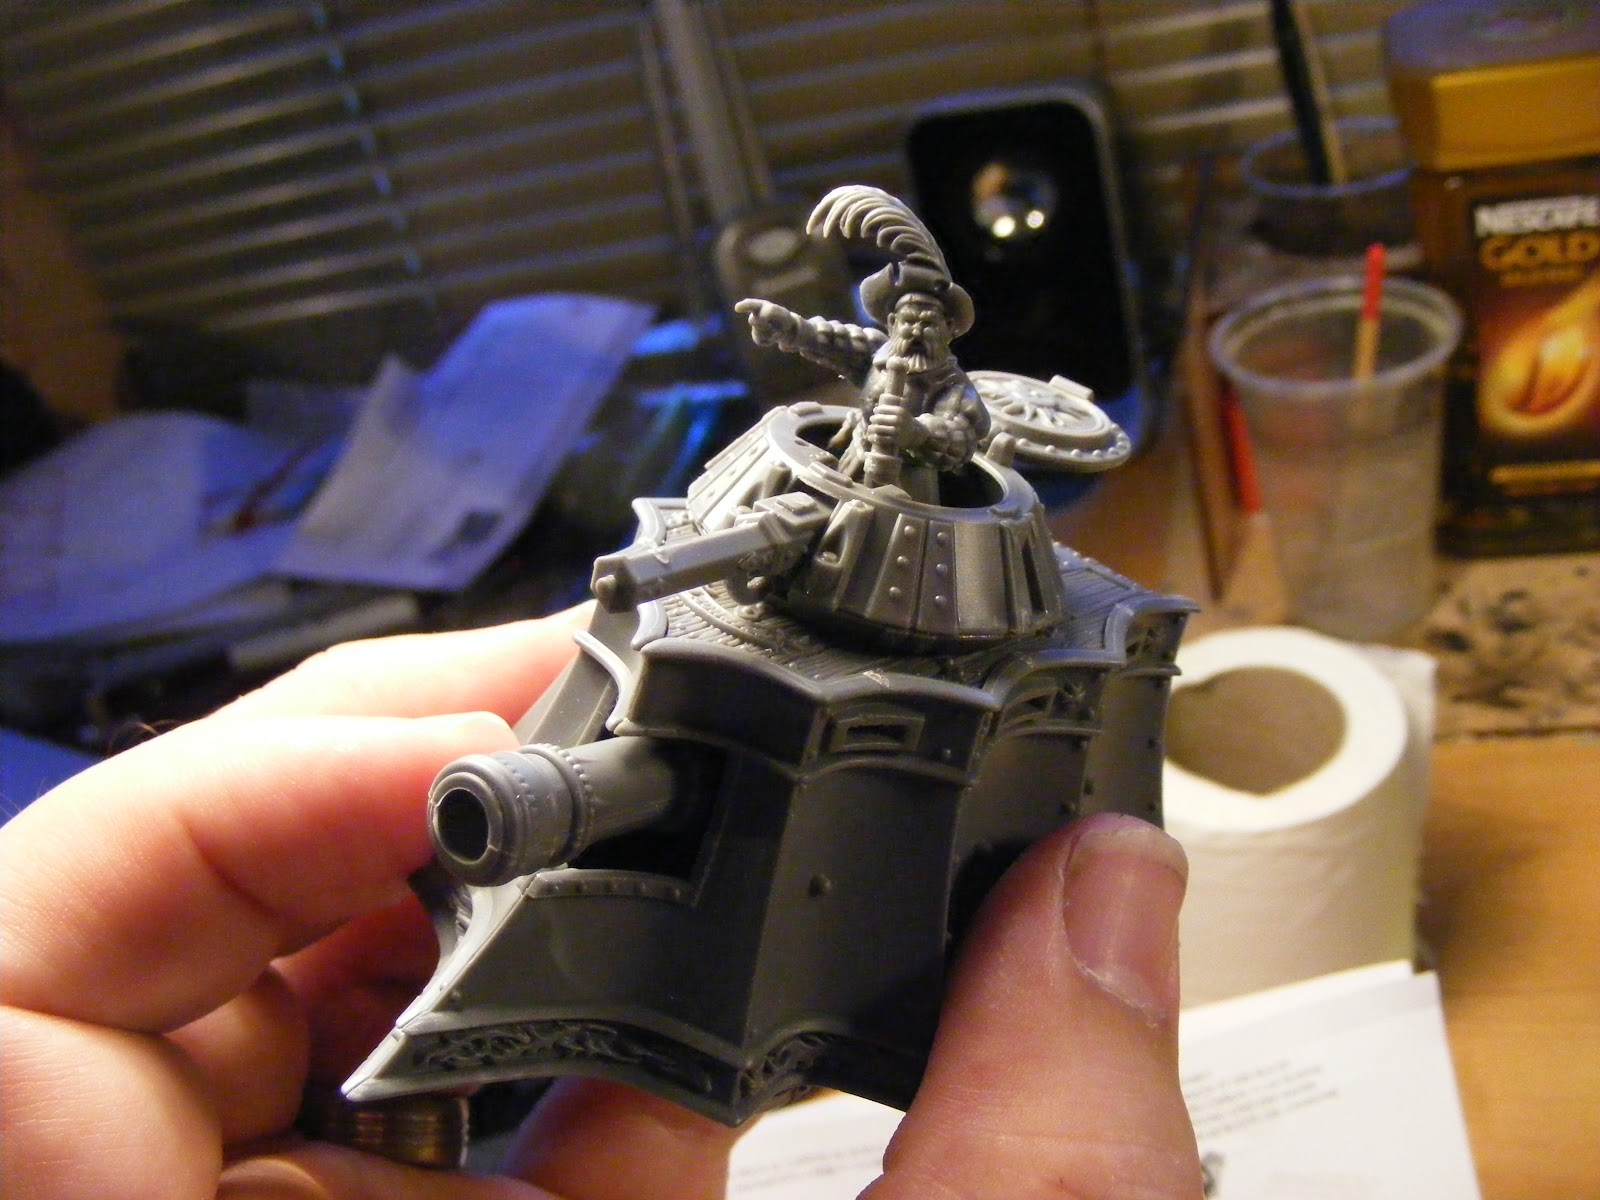
The placement of the turret fills the last remaining hole sealing the interior from the outside world.
 
 
Even peeking down the side of the canon does not allow access to the interior.
 
The instructions recommend painting the interior before fixing the sides. I find it hard to motivate myself to do this when it won't be seen again.
 
I prefer to spend my time paint the excellently detailed outside of the vehicle. I really like this model, the concept, the detail and the actual ease of construction has moved this into my top ten. I just hope I can do it justice in the painting stages.
 
I will leave you with some close up photos of the model that I took with a macro lens while waiting for the glue to fully cure. Enjoy...


Wargaming Castle - Part 4

With the application of a black under coat then 'over brushed' with a medium grey the castle prototype is starting to look more like a finished product.


The door was made from a scrap of balsa that I had at hand. Not very convincing I'm sure you'd agree, I think this that it needs some kind of stone frame to go around it.


No so bad from a distance.


The battlement bracing have worked well considering that they were the off cuts from the merlons.


Still working on a stair case to finish the narrative of the structure. I am considering magnetising the joins between the castle components. This will add to the robustness of the structures during game play.

Monday, 20 August 2012

Wargaming Castle - Part 3

If you have seen the other two wargaming castle blogs that I have posted over the past week you will be familiar with the development of a modular castle suitable for playing a wargame. 

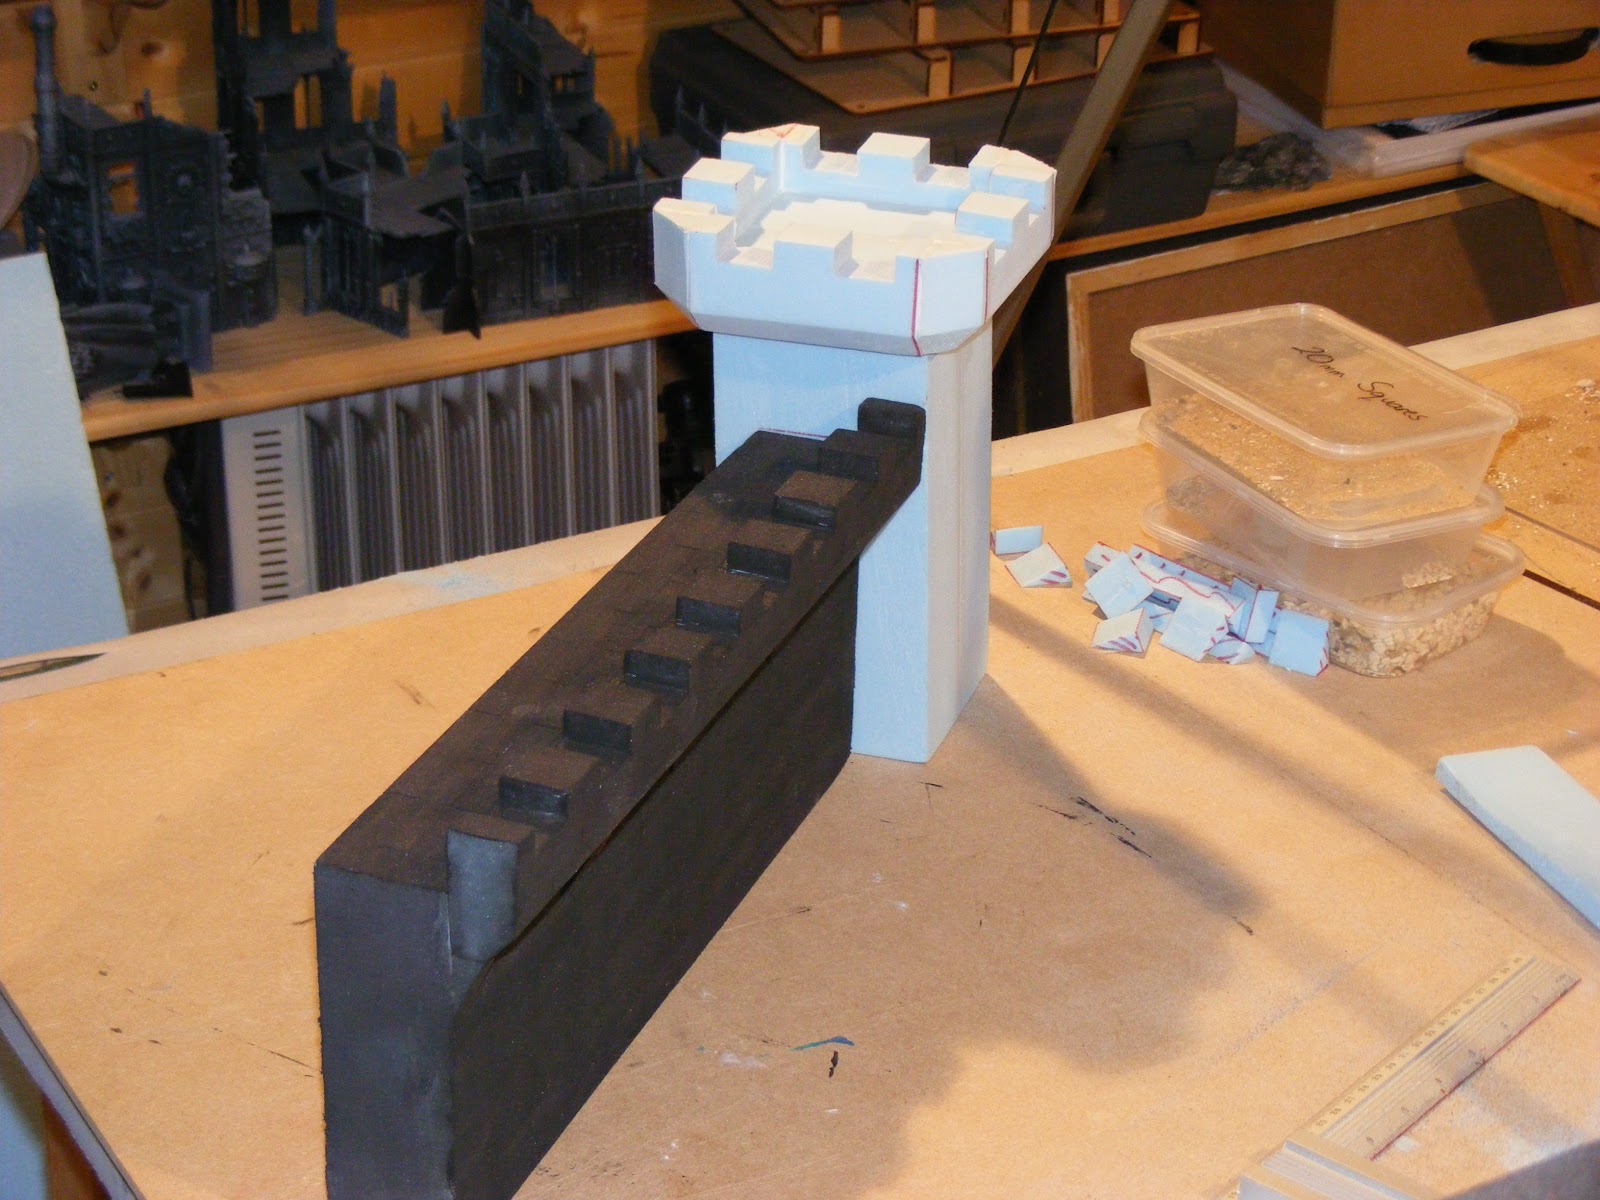
With the prototype wall section being complete apart from the final paint coating I decided to move onto the tower section.


The tower is simply made up of two 8'' by 4'' sections of 2'' ('' denotes inch) fixed together with 'no-more nails'. I have found this to be a great adhesive for this kind of work as it has a quicker drying time than the contact adhesive used in other areas on the project.


The battlements have been cut and fixed in place using the same measurements and methods as the wall section so I won't be repeating the instructions here. The corner sections were problematic to create having to cut four bespoke corners to fit and then fill any gaps. On future towers I intend to overlap the battlement on the corners to simplify the construction part of the project.


I placed the wall section next to the tower and noticed that the area for the door leading on to the battlements is limited. To prevent this from becoming a noticeable, I modified the support block shown below.


The usual sloping support blocks.


The sectioned support blocks, still sloping, but not to a point. The red line mark indicates the top of the wall. The distance between the bottom of the support block and the red line is 35mm, a suitable size of a door frame for a 28mm scale.


Only two of the four sides of the tower will have doors placed in them to prevent doors from appearing on the outside of the castle.